
I’ve had a few people ask questions about splitting audio recently. How to do it, why would you want to, which way is best? So today I’m going to go over how you can split the audio channels inside of OBS and then some basics about working with that file. For those that want a video regarding it because you find that more helpful, there is a video at the end of this post.
Why would you want to split audio?
The first reason most streamers look to split audio is of course so that they can play music on stream and not have it stored in their VODs. The second reason that people look to split audio is because they want to use the content at a later time for say a Youtube video or some other content creation reason where maybe they don’t want all of the alert audio in that video. Additionally they want both the alerts out of the video, plus no music, and finally they want to be able to edit the audio levels to ensure that their voice is more clearly heard over any other activity.
What’s the best way to split audio?
To be honest I’m not sure if there is a “best way” there could be other ways than what I am showing in this post and the corresponding video. While I have a lot of knowledge about a a wide range of topics, I’m not really an expert in any streaming subject.
How do I split my audio?
Disclaimer: Please make sure you always have a backup of your OBS settings/configs before you make any changes so that you can easily roll back the changes you try to make. Likewise, you are using these directions of your own volition and I am not responsible for helping you get things working again if these don’t work perfectly with your setup.
One of the first things to note is that there is not a way to split audio from your twitch VODs. Twitch only stores the file with one audio track so going back and downloading the VOD will not give you a file that you can split later.
Splitting for Twitch VODs
If you are just looking to split audio for twitch’s VOD you don’t need to worry about recording everything that that is the first item I’m going to cover in the video. For this type of splitting, at least in OBS, you would go into your OBS settings window, go to the Output area, and you have the Audio Track, as well as an option for Twitch VOD Track. Check the box for Twitch VOD Track and then select 2 as your VOD track.
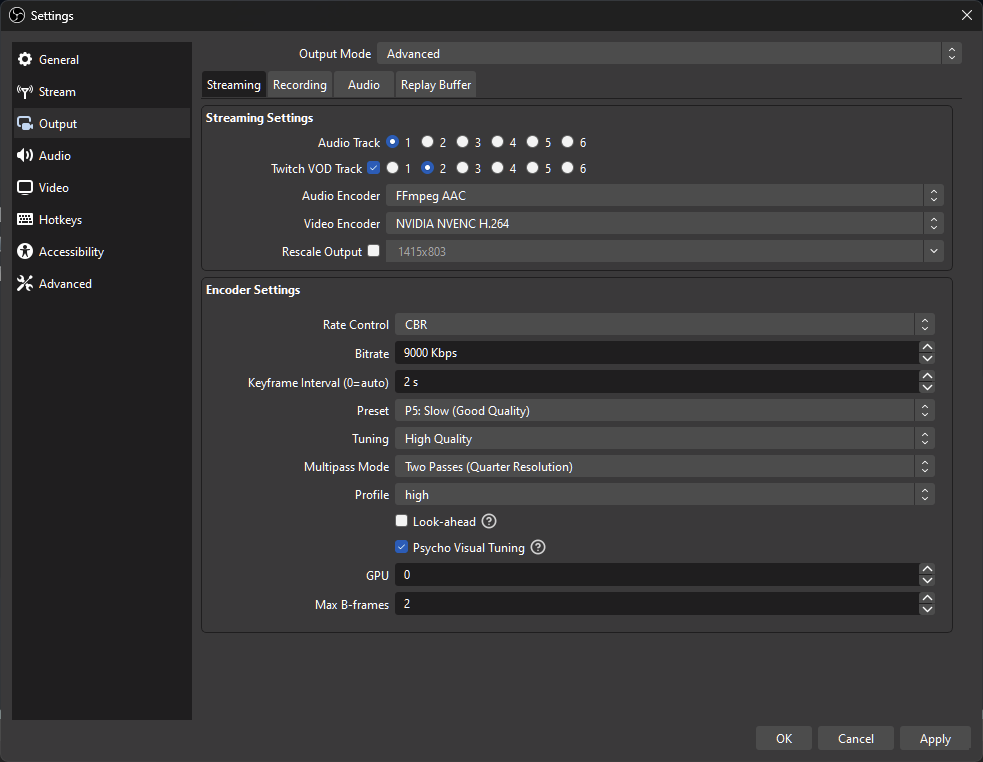
Once you have the Twitch VOD Track selected, go ahead and hit OK. Now that you are back at the main window look at your Audio Mixer in OBS.
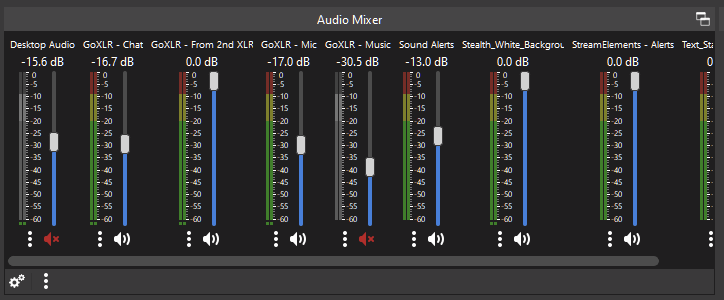
You’ll notice two small gears in the bottom left corner of the mixer, click on those gears, and you’ll see a list of all of your sources. It is possible that you don’t see all of your sources here so your music audio source may not be visible on the scene you are currently in. To help with that at the bottom left is a checkbox for ‘Active Sources Only’ and if you remove that check box you’ll see all of your audio sources for all of your scenes. Once you see all of your audio sources what you need to do is go and find whatever source you are using to control your music, for some people it could be an application source, others it could be your mixer’s music channel. Once you find that in the list uncheck the checkbox in the column labelled 2.
By finding your music channel and unchecking track 2, it will continue to send the music audio for your live stream but it will not send it to Twitch to be stored in your VODs. That is how easy it is to get your audio split for music in your Twitch VODs.
Splitting for use in videos later:
Are there ways to do this other than what I am about to put out there, I’m sure there are. Especially with AI based editing tools now that can help more with audio. However this is the way I am familiar with so this is what you can get here.
If you are looking for anything beyond splitting off music for the VOD then you need to record your videos with your streaming software for editing later. This takes up A LOT of space. So if you don’t have the drive space for it I wouldn’t recommend this. Video files, for a couple hours of stream, can be huge. Especially if you are streaming at higher resolutions like 1440p. My last video was 22 minutes and it was over 1 GB in size. If you extrapolate that out that means each hour is up to 3 GB or more of drive space. So if you are planning on recording multiple streams and then editing those recordings together for a youtube video or other media content you need to have plenty of storage space.
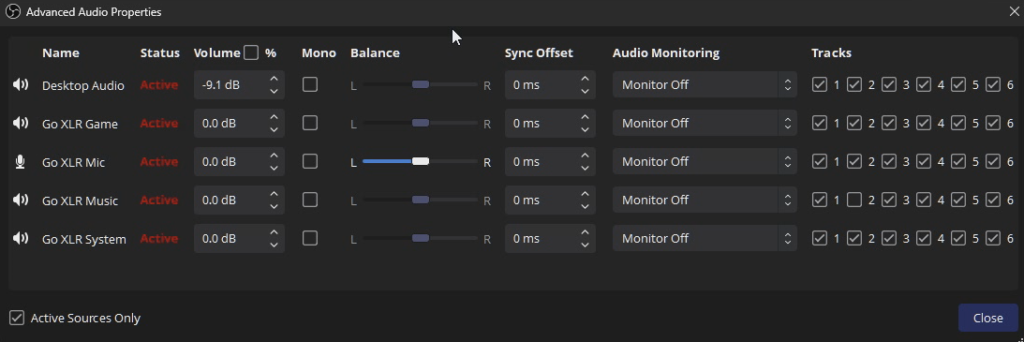
Onto the important part. In the screen clip above for the Advanced Audio Properties, you saw that you can select audio destinations for up to 6 track locations. This is where things get slightly confusing and also very customizable. The above screen clipping was from my 2nd computer’s OBS where I don’t have the same number of sources that I do on my actual streaming rig. My actual streaming rig advanced audio looks like this.
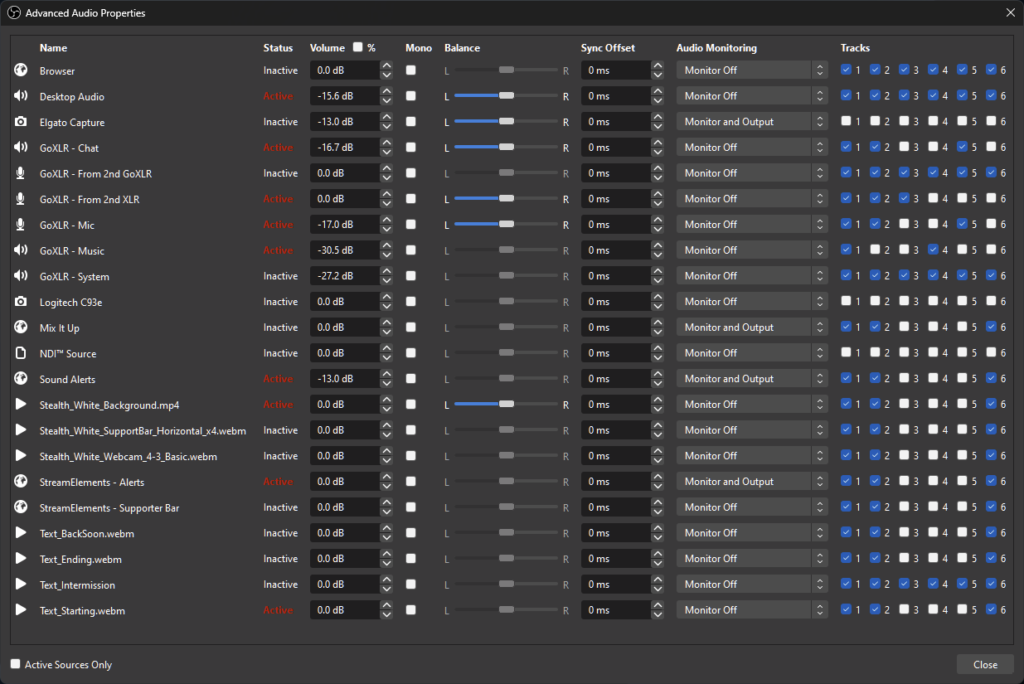
As you can see, there are a lot more options and I have a lot more items checked and unchecked for the various tracks. This is where you determine what you want to have available for recordings etc. Important things to note are Track 1 is what is played on your Twitch stream as you are live so usually you want everything to go there. Track 2 is what goes to your Twitch VOD so as explained before you want to make sure that any Music channel is turned off there.
The other four tracks are where your audio splitting for videos will happen. The first thing I would do is uncheck everything in tracks 3-6. This makes all of those tracks completely empty. In track 3, put in any audio sources that you would definitely want in a recording. If you are mostly playing games in your recordings then put in the game audio if you are doing just chatting then make sure your microphone is there. Track 3 will be the track that is used when you want just that audio. The other tracks you can play with to figure out what works best to have available for your editing purposes. For instance, you might want to have a track that has all of your alert audio, so that you can clip that audio during editing and have it only there for certain pieces or make it quieter if your alerts usually go louder than your voice on stream.
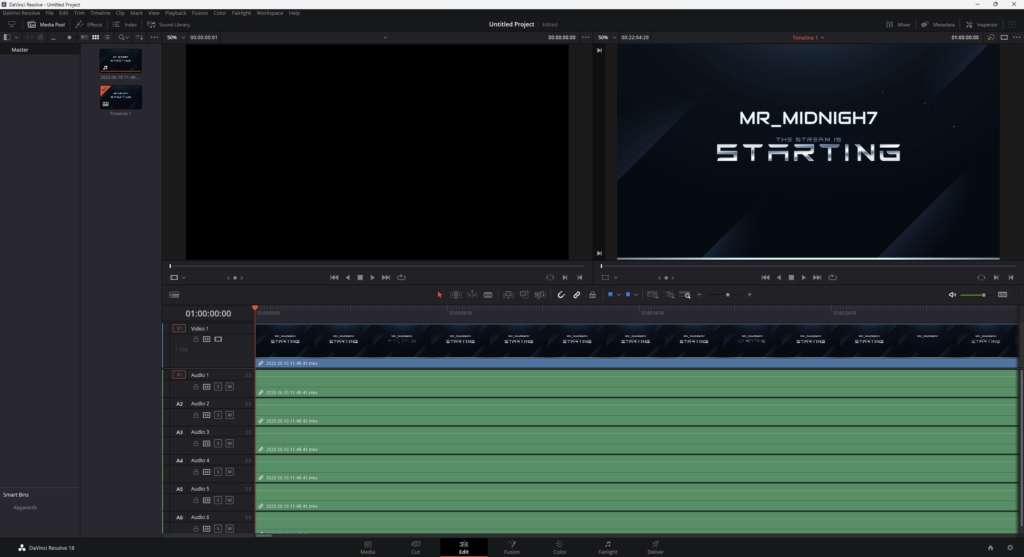
The end result of these settings is that when you have OBS record to your drive as well as stream to Twitch you then have a video file with 6 audio tracks. If you run tracks 1 and 2 as ‘Twitch Only’ tracks you can delete those audio tracks right away from your video. Then you have the option to take the remaining 6 tracks of audio and change volume/clip/delete as you feel best suits your video needs. For instance below you’ll see the video edit from my last video where you can see all 6 audio tracks in DaVinci Resolve as I haven’t cut any of the the audio yet.
I hope that anyone reading this has found it helpful and a good explanation of how to split audio for OBS. I am sure that other recording software works similar but I haven’t used any of the other ones out there so I can’t say that with 100% certainty.
Video explanation